Audio Input Cartridge for Game Boy
For a while now, I’ve wanted to try designing my own Game Boy cartridge circuit board. However, instead of making a standard cartridge designed for games, I wanted to make a cartridge to experiment with a hidden feature of the Game Boy line - an audio input! Though it was never used by official licensed games, the original Game Boy, Game Boy Pocket, and Game Boy Color, all support audio input on pin 31 of the cartridge connector. Presumably, this was implemented in order to allow game developers to use external sound processing, instead of the built-in sound hardware.
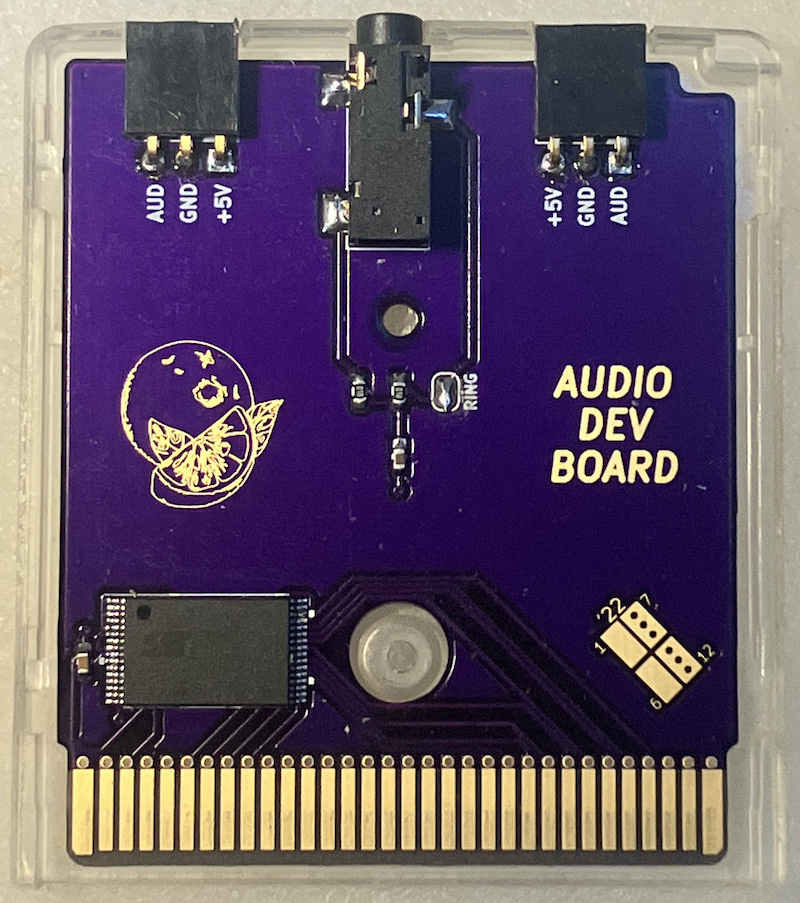
I decided to build a relatively simple cartridge as an “Audio Dev Cart” - a cartridge to help me experiment more with the audio input. My design is simple - a 32 KB flash chip to hold the software, a standard 3.5mm input for an audio signal, and pin headers to allow the cartridge to be connected to a breadboard for prototyping audio circuits.
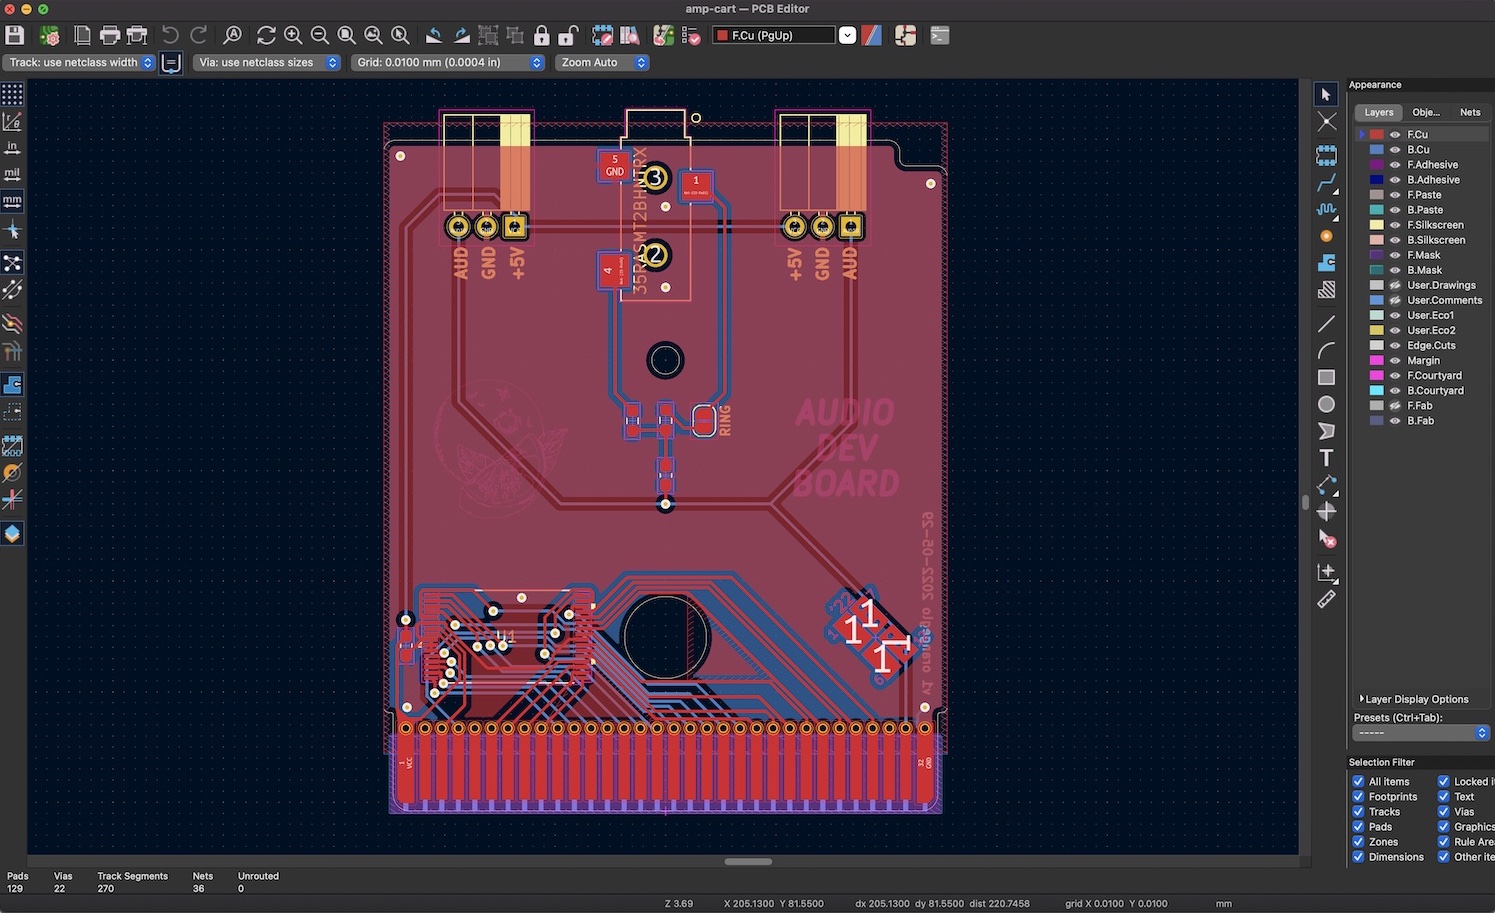
I designed the circuit board using the open source PCB design software KiCAD. Thankfully there are excellent resources for making Game Boy cartridges in KiCAD, such as HDR and djeddit’s footprint files. These made it super easy to get a basic cartridge design started. I also relied heavily on a series of YouTube videos by insideGadgets, an awesome company that produces some of the best reflashable Game Boy cartridges and hardware. Since I only used a 32 KB chip, no memory mapper chip was needed, meaning the wiring and programming is relatively straightforward.
The audio input circuitry is very simple - a 3.5mm stereo jack connected to some resistors and a capacitor to form a very basic audio summing and coupling circuit. This circuit is connected directly to the audio input pin on the cartridge. I also added some pin headers to allow the cartridge to be connected to an external circuit - the header provides access to 5 volts, ground, and the audio input pin.
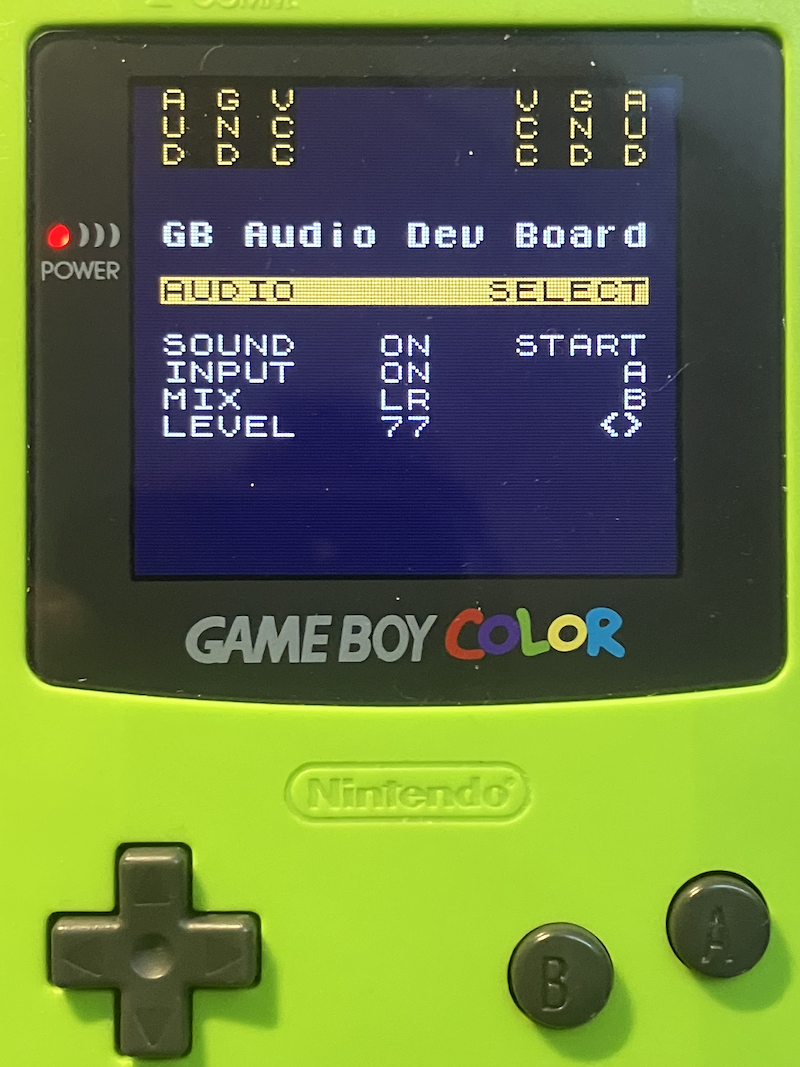
Just connecting the audio input to the correct pin is not enough to get sound output from Game Boy’s speakers. To use the audio input pin, you need to configure the system’s sound hardware correctly with the ROM running on the flash chip. To do this, I wrote a simple ROM using GBDK, a C-based development toolkit for the Game Boy. Using example files, and some help from the gbdev wiki, I was able to build a nice program to activate the audio input, allow volume and panning adjustments, and even implement a very basic tone generator!
This project was super fun to work on, and a great stepping stone into the world of cartridge and ROM development for the Game Boy. I have some fun ideas for the next revision of this project, so stay tuned if you’re interested!